Filter
Web Application 에서 관리되는 영역으로 Spring boot Framework에서 Client 로 부터 오는 요청 / 응답에 대해서 최초 / 최종 단계의 위치에 존재하며 , 이를 통해서 요청/응답의 정보를 변경하거나 , Spring 에 의해서 데이터가 변환되기 전의 순수한 Client의 요청 / 응답 값을 확인 할 수 있다.
유일하게 ServletRequest,ServletResponse 객체를 변환 할 수 있다.
주로 Spring 에서는 request/ response의 Logging 용도로 활용하거나 , 인증과 관련된 Logic 들을 해당 Filter에서 처리 한다.
이를 선 / 후 처리 함으로써 , Service business logic과 분리 시킨다.
Spring MVC request life Cycle을 그림으로 표현 한 것이다

그림처럼 리퀘스트가 처음들어 왔을때 제일 앞단에서 부터 filter - dispatcherServlet - interceptor 순서로 들어오게 된다. Spring AOP는 interceptor 뒷 단에서 실행된다 .
Filter는 어플리케이션이 Request를 처음 받는 곳이다 Filter에서 Request를 받아서 한번 살펴보자 .
Lombok 을 사용해보려한다.
lombok 사용을 위해선 Spring initializer에서 lombock 을 체크하던지 maven repository에서 dependency를 찾아 추가해주면 된다. 주의할 점은 lombok은 annotation processor를 통해 돌아가기 때문에 lombok의 annotation processor도
함께 주입 받아야 한다.
dependencies {
    implementation 'org.springframework.boot:spring-boot-starter-validation'
    implementation 'org.springframework.boot:spring-boot-starter-web'

    // https://mvnrepository.com/artifact/org.projectlombok/lombok
    compileOnly group: 'org.projectlombok', name: 'lombok', version: '1.18.12'
    //lombok annotationProcessor
    annotationProcessor 'org.projectlombok:lombok'

    testImplementation 'org.springframework.boot:spring-boot-starter-test'
}
lombok을 활용하면 어노테이션을 통해 getter setter 기본생성자 toString equalshashcode 메서드등.. 을 만들어준다 .
lombok 은 anntation processor를 활용해 컴파일 시점에 lombok 의 annotation 이 붙어 있는 경우 해당 annotation 에 정의된 대로 코드를 추가해준다 . gradle을 보면 lombok이 compileOnly로 되어 있는데이는 컴파일 시에 이미 어노테이션에 해당하는 코드들(getter , setter 등등 . ..)이 클래스 파일에 저장이 되기 때문에 , 런타임 환경에서는 필요가 없다 .
User 라는 클래스가 있다 name 과 age라는 필드를 갖고 있다 .

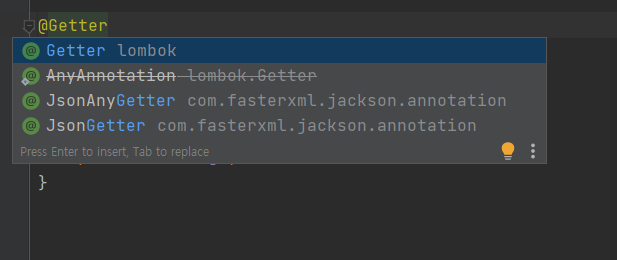
디펜던시가 잘 들어왔다면 위처럼 lombok의 어노테이션을 사용할 수 있다.

Getter , Setter , AllArgsConstructor(모든 필드를 파라미터로 갖는 생성자) 세가지 어노테이션을 붙혀 봣다

왼쪽아래 Structure를 클릭하면 해당 클래스에 대한 구조를 확인 할 수 있다.
따로 Getter Setter 생성자를 만들지 않았는데 알아서 생겼다 . lombok 어노테이션을 통해서 자동으로 생성된 것이다.
사소하지만 편하다 .
추가로 @Slf4j는 로그에 대한 기능들을 사용할 수 있게 하는 lombok의 어노테이션이다 .
@Slf4j
@RestController
@RequestMapping("/filter-api/user")
public class FilterController {

    @PostMapping("")
    public User user(@RequestBody User user){
        //info() 안에 "User:{}" <-중괄호안에 , 뒤에 있는 user가 toString으로 로깅된다.
        log.info("User: {}",user);
        return user;
    }
}
필터를 구현해 보잡.
필터를 구현하기 위해 클래스를 만들었다 필터를 구현하기 위해서는 Filter 인터페이스를 구현해야 한다 .
구현 메서드로는 doFilter() , init() , destroy() 세가지 메서드가 있다
메서드 설명
1.init()
웹 컨테이너(톰캣)이 시작될 때 필터 객체를 생성하고 , 이때 객체가 생성되면서 최초에 한 번 호출되는 메서드이다. FilterConfig 객체를 넘겨 주기 때문에 이를 통해 여러가지 설정값을 받아서 처리시 필요한 객체를 초기화 하는데 사용된다.
2. destroy()
필터 객체가 제거될 때 실행되는 메서드이다 . 보통 초기화시 생성했던 자원들을 종료하는 기능에 사용된다 .
3.dofilter(ServletRequest request ,ServletResponse response , FilterChain chain)
실질적으로 요청과 응답을 조작하는 메서드이다 . 파라미터로 들어오는 request , response 객체를 받아 조작하며
요청이 들어올 때마다 실행된다 . chain.doFilter() 메서드의 전후로 작업이 나뉜다.
디스패처 서블릿을 통해 사용되기 전에 처리할 작업은 chain.doFilter()의 전에 정의하고
디스패처 서블릿에 의해 사용된 후에 처리할 작업은 chain.doFilter() 다음에 정의한다.
필터를 사용해 요청 ,응답데이터를 로그에 찍는 기능을 구현해보려한다 .
먼저 요청을 처리할 컨트롤러를 만들었다 .
post방식의 요청을 처리하고 user정보를 받아서 user를 반환하는 메서드를 포함하고 있다 .
Controller
@Slf4j
@RestController
@RequestMapping("/api/filter")
public class FilterController {

    @PostMapping("")
    public User user(@RequestBody User user){
        log.info("User: {}",user);
        return user;
    }
}
Dto
유저정보를 담을 dto
@Data
public class User {
    private String name;
    private int age;
}
Filter class
전역으로 사용되는 필터라는 의미로 GlobalFilter 클래스를 만들었고 Filter 인터페이스를 구현했다 .
//필터를 특정 url 에만 적용하고싶으면
//@WebFilter에 원하는 url 지정
//애플리케이션 메인메서드에 @ServletComponentScan 붙힌다.
@WebFilter(urlPatterns = "/api/filter/*")
@Slf4j
public class GlobalFilter implements Filter {

    @Override
    public void init(FilterConfig filterConfig) throws ServletException {

    }

    @Override
    public void destroy() {

    }

    @Override
    public void doFilter(ServletRequest request, ServletResponse response, FilterChain chain) throws IOException, ServletException {

        //필터에서는 request , response 객체를 변경할 수 있다.

        //전 처리
        ContentCachingRequestWrapper httpServletRequest = new ContentCachingRequestWrapper((HttpServletRequest)request);
        ContentCachingResponseWrapper httpServletResponse = new ContentCachingResponseWrapper((HttpServletResponse)response);


        chain.doFilter(httpServletRequest,httpServletResponse);

        //후 처리


        //req
        String requestURI = httpServletRequest.getRequestURI();
        String reqContent = new String(httpServletRequest.getContentAsByteArray());
        log.info("request url : {}  ,request body:{}",requestURI,reqContent);

        //resp
        int httpStatus = httpServletResponse.getStatus();
        String respContent = new String(httpServletResponse.getContentAsByteArray());
        log.info("response status:{} , responseBody:{}",httpStatus,respContent);
        httpServletResponse.copyBodyToResponse();

    }
}
위의 코드를 보면 이상한점이 있다 . dispatcherServlet에 전달되기 전에 요청 데이터를 로깅한다고 했는데
처리 로직은 chain.doFilter() 메서드 후에 모두 몰려 있다 .
Http요청 데이터는 BufferedReader 를 통해 읽혀 지는고 BufferedReader 는 커서단위로 데이터를 읽어들이는데
데이터를 끝까지 읽으면 다시 데이터를 읽어 들일 수 없다 . 로깅을 한다면 필터단에서 요청 바디를 읽어서 출력해야하는데 필터에서 한번 읽힌 후 dispatcherServlet을 통해 Controller단으로 요청이 넘어가면 해당 바디를 파라미터로 지정된 오브젝트에 매칭시키기 위해 요청 바디를 다시 읽게되면서 에러가 발생한다 .
이를 해결하기 위해 ContentCachingRequestWrapper 클래스를 사용한다 해당 타입을 생성하여 파라미터로 HttpServletRequest를 넘기면 데이터를 캐싱해놓고 다음에 필요한곳에서 데이터를 리턴해주는 형식이기 때문에 위와 같은 에러가 발생하지 않는다 .
주의할 점은 ContentCachingRequestWrapper는 생성자로 httpServletRequest 객체를 갖는데 이때 데이터를 복사해 두는게 아니고 해당 데이터의 길이만 가지고 있기 떄문에 스프링이 요청바디 내용을 읽고나서 로직이 끝난 후 필터로 돌아와야(chain.doFilter()이후) 해당 데이터에 접근할 수 있다 . 살짝애매합니다 .
filter를 사용하기 위해선 애플리케이션에 등록을 시키거나
애플리케이션이 시작될때 서블릿 컴포넌트 스캔을 통해 @WebFilter가 달린 클래스를 필터로 인식하게 하는 방법이 있다 .
위의 코드에서는 @WebFilter(urlPatterns = "/api/filter/*")을 사용했다 필터를 등록하고 해당필터의 범위를 지정하는 어노테이션이다 .
필터에 @WebFilter를 지정했다면
아래와 같이 @ServletComponentScan을 달아주면 된다.
@SpringBootApplication
@ServletComponentScan
public class HelloApplication {

    public static void main(String[] args) {
        SpringApplication.run(HelloApplication.class, args);
    }

}
'SPRING BOOT' 카테고리의 다른 글
| Spring-boot 공부 8 - RestTemplate(Server to Server 간의 통신) (0) | 2021.05.25 |
|---|---|
| Spring boot 공부 6 - interceptor (1) | 2021.05.22 |
| Spring boot 공부 4 - Error 데이터 커스터마이징해서 응답 (0) | 2021.05.20 |
| Spring boot 공부 3 - 예외 처리 ControllerAdvice와 @ExceptionHandler (0) | 2021.05.20 |
| Spring boot 공부 2 - validation 과 custom validation 만들기 (0) | 2021.05.20 |


